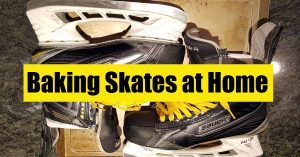
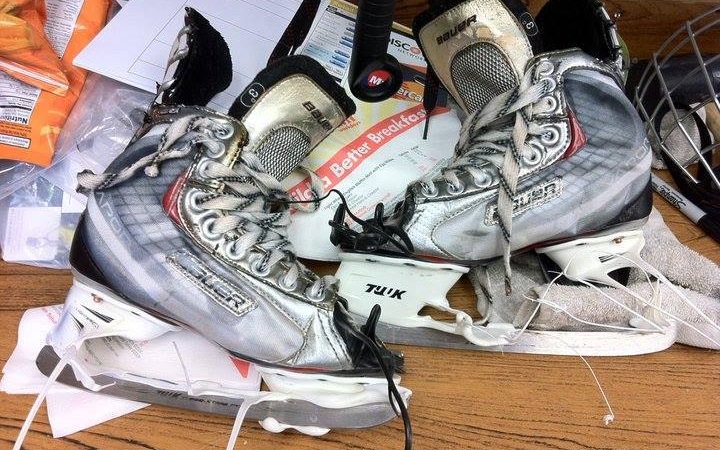
 This article is designed to help people bake skates in the comfort of their own home. Before we start, though, I do want to highlight one thing: If possible, use a pro shop! Skate ovens at pro shops are specially designed to minimize the possibility of anything going wrong during the baking process. While this same effect can be achieved at home, there are far more opportunities for you to screw up and damage your skates. And damaging your skates is a real risk here if you do things improperly. Proceed with caution. With that said, there are still people who don’t have this opportunity, either because they don’t live near a pro shop, or the only one around charges excessive prices ($10-15 is reasonable, $40 is not). This article is mainly written for these people. With that in mind, let’s begin!
Verify oven’s temperature
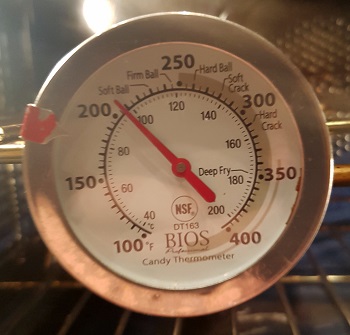 If possible, buy an oven thermometer to make sure your oven is doing what you want it to – some ovens run hotter or cooler than what they say, which can adversely affect the baking process. Something like this would cost no more than $10, and stays right in the oven for easy monitoring. This way, you can account for these variations when setting the temperature. I’m using a candy thermometer here, which does the same thing but doesn’t stay in the oven.
Set oven to 20F above the skate’s recommended baking temperature on Convection mode – This extra heat will make up for the later steps where the oven cools off before the skate goes in. If your skates don’t come with specific baking instructions, 210F should work well. Using your oven’s convection feature is also important. The increased airflow will ensure there are no hot or cold spots that could affect the baking process.
Mise en place
This phrase gets used a lot in the cooking world, and it’s very appropriate here as well. It roughly translates to ‘everything in its place,’ and it means that before you start doing anything else, you should have everything you need ready to go, and within arm’s reach. 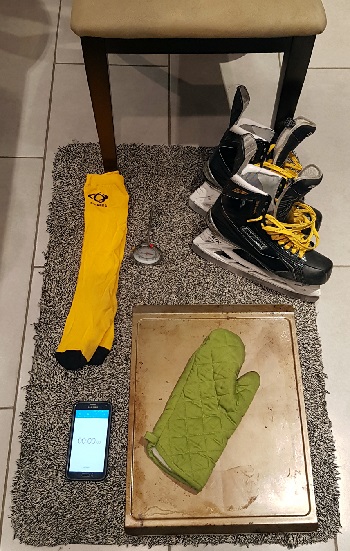 When your skates are in the oven and ready to come out, that’s not the time to be running around the house looking for something to protect your kitchen floor. Make sure you’ve gathered the following things while the oven preheats:
- Oven thermometer (already in the oven, hopefully)
- Timer/stopwatch/clock
- Skates – unlaced enough that your foot easily slides in without requiring force
- Large baking sheet
- Oven mitts
- Chair
- Skate-safe floor mat
- Skate socks (on your feet)
Turn oven off
Typically, oven elements will reach a higher temperature than the oven is actually set to, and this can cause damage if they’re allowed to shine directly onto the skate. The skate ovens in hockey shops solve this problem by putting the heating elements in a separate chamber at the back and circulating the hot air using fans, but that’s not an option with most home ovens. Instead, turn the oven off once temperature is reached, and wait a minute or so for the element to cool back down to the right temperature. Don’t open the door yet.
Skates on the baking sheet
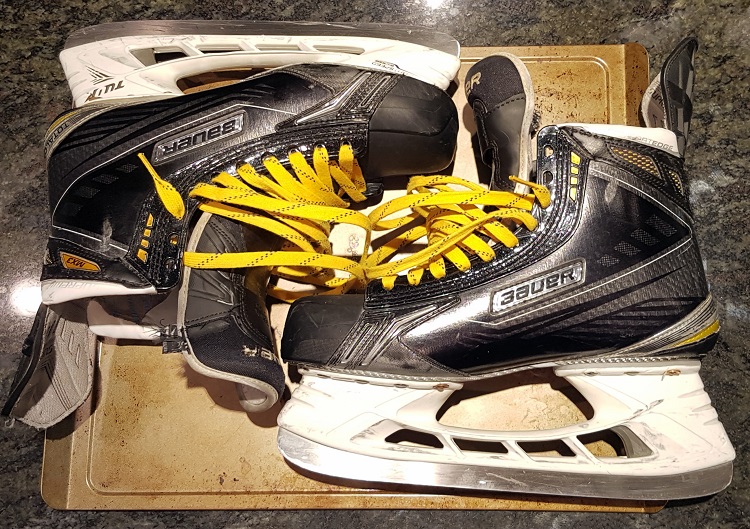
Don’t put your skates directly on the rack. Lay them sideways on the baking sheet. If you can’t fit them both at the same time, just do one at a time but don’t cut any corners the second time around!
Bake until golden brown
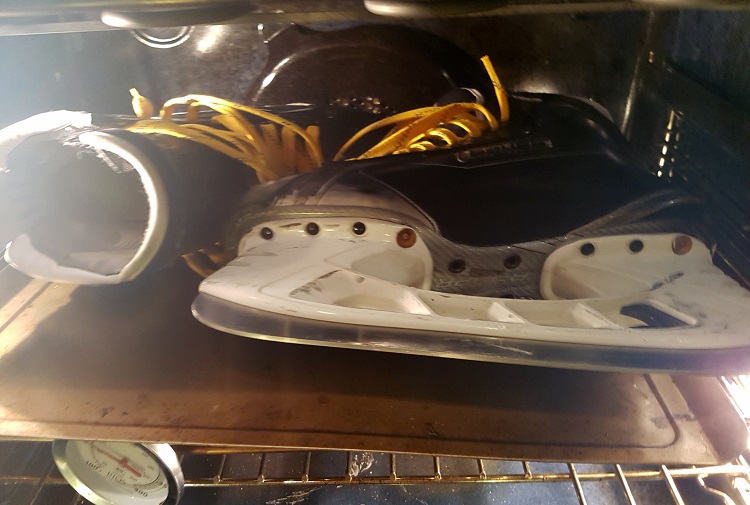
Put the baking sheet on the center rack, and make sure the skates aren’t touching anything except that sheet. At this point, start your timer. Your skates should come with directions on how long they should be baked. Follow the time limit specified – if not, 3-4 minutes is a good, safe estimate. While going over time is possible on some skates, I would suggest exercising caution here unless you know exactly what you’re doing and are willing to take on that additional risk.
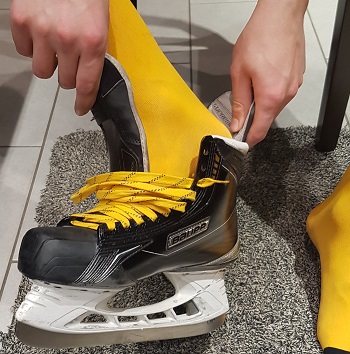
Put them on, tie them up
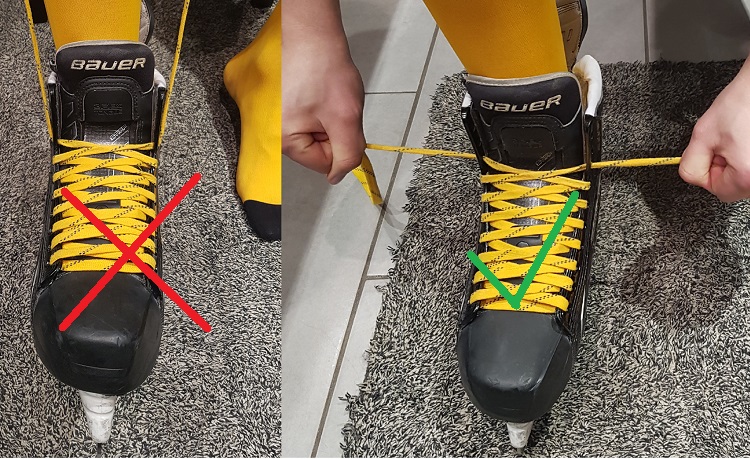
Take one skate out of the oven first, slip it on your foot, and lace it up with a moderate level of tightness. Then do the same for the other one. Very important – always pull straight outwards on the eyelets when the skates are warm! Never pull up, down, or at an angle. When the skate is warm, the eyelets can rip out from the boot easily if tightened the wrong way. Yes, this means they won’t be as tight as they’ll be when you play hockey, and that’s okay.
Sit until cooled
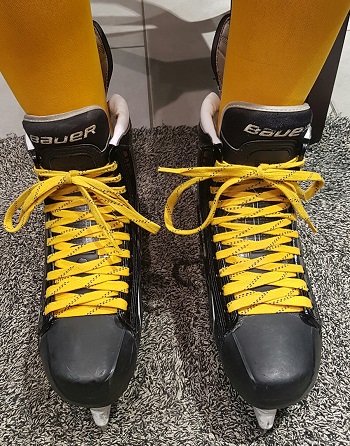
The eyelets still need to be treated gently until the skate fully cools, otherwise they risk being damaged. The easiest and most effective way to do this is to sit still for approximately 10-15 minutes, with your knees and ankles at 90 degree angles. If you want slightly more aggressive molding, it is alright to stand for the first minute – but do not walk around, bend your knees, or flex your ankles forward. This will put stress on the eyelets.
Wait
Once the skates are off your feet, do not use them immediately. Even if they’re cool, the adhesives still need to set again, and this takes time. 24hrs is a safe length of time, but you can skate on them after 12 if needed.
Where to get a deal on skates
If you’re one of the unlucky souls who needs to order skates online, and bake skates at home because you don’t have a good hockey shop nearby, I’ve got a few links for you. Some of these are affiliate links which help support this site and the writers.
- Hockey Monkey (clearance skates section)
- Pro Hockey Life (For Canadians)
- Pure Hockey
- Hockey Supremacy (for Canadians)
WARNING WARNING WARNING
If you’ve got a sweet pair of top-of-the-line, just released, pro level, $1000 skates you could seriously mess them up if you are not careful. Don’t start browsing facebook, or sit down for a second to watch some Netflix, terribly horrible things could happen to your precious skate. If you can bare it, just scroll down to see.
Home skate baking gone WRONG
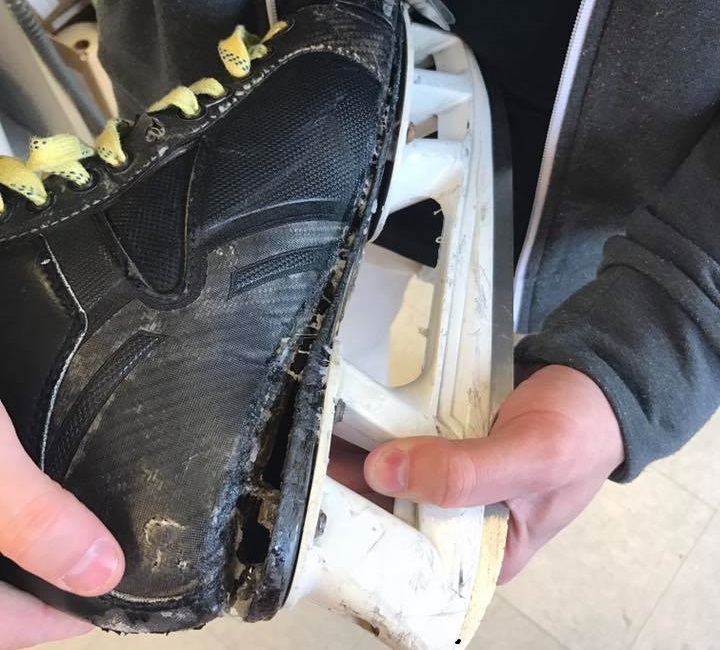
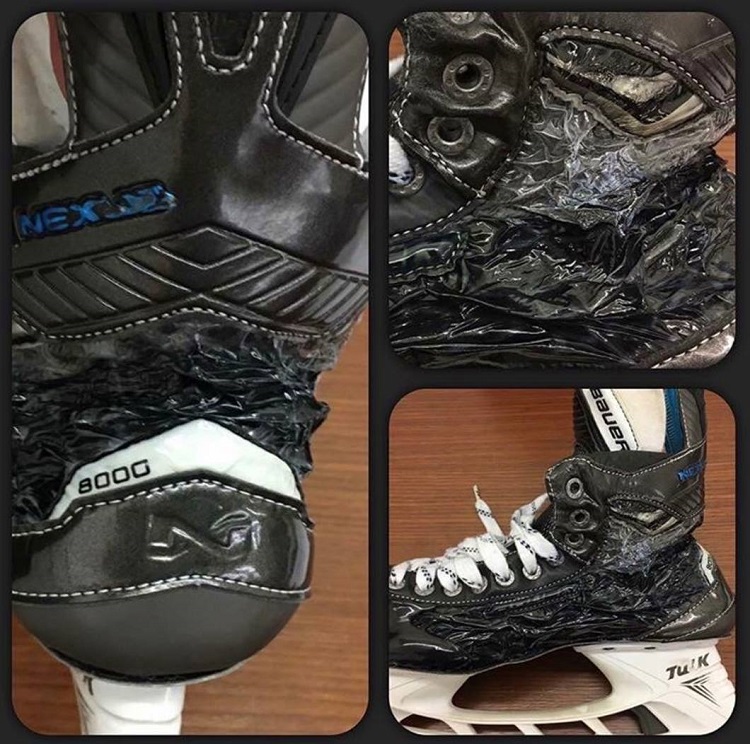
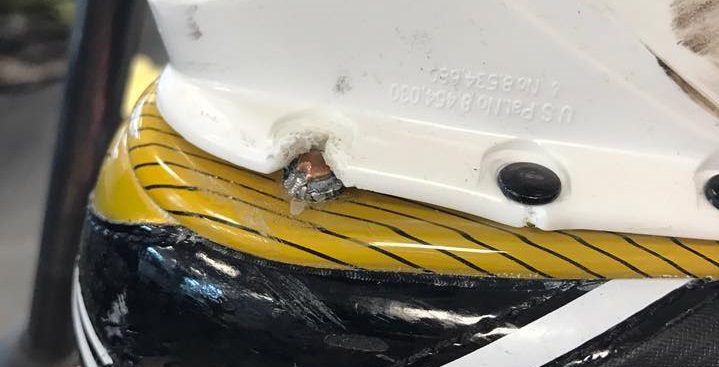 You’ve been warned 😉
Learn to Play Hockey Online – Join The Pond for easy to follow video courses, challenges, and a private social group to quickly improve your hockey skills at home